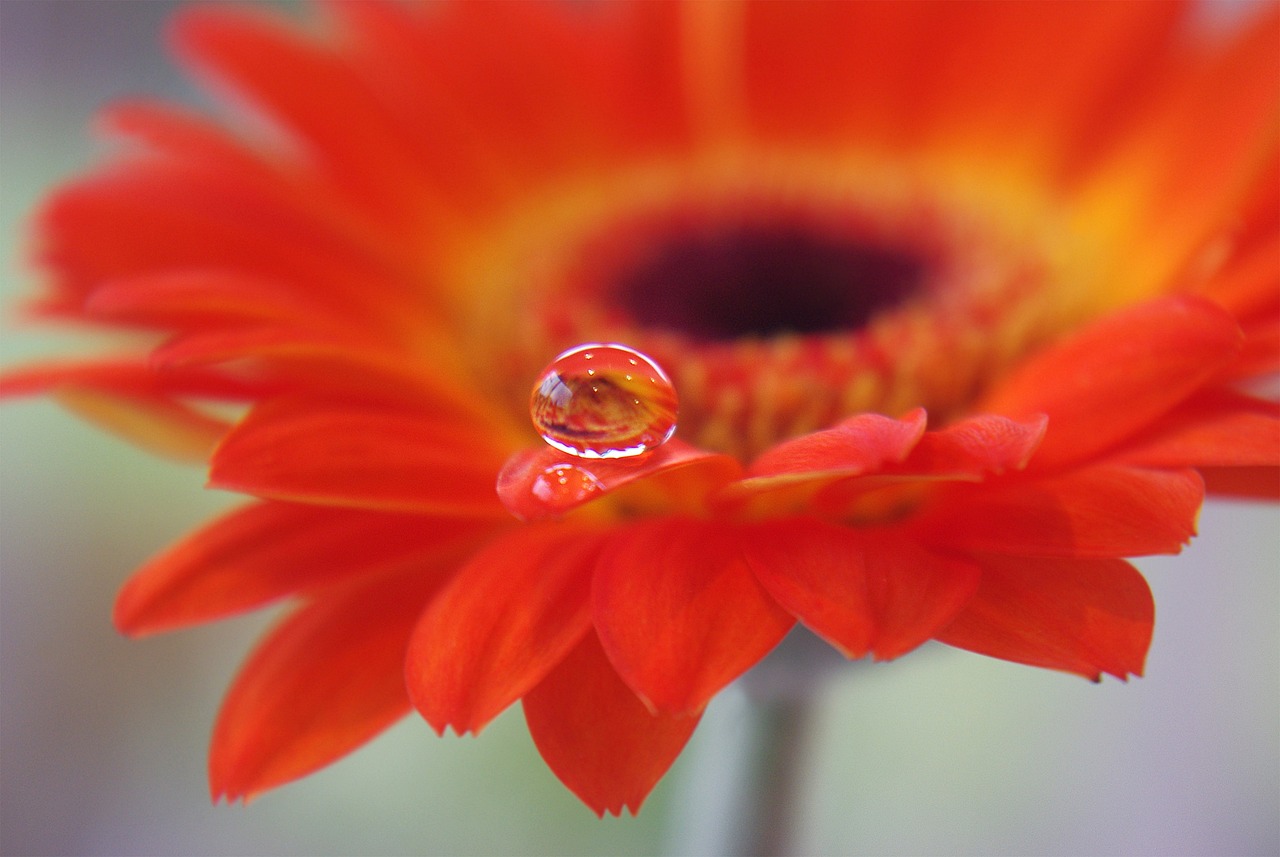
Tatting an anemone is a fascinating and creative process that allows you to bring the delicate beauty of this flower to life. In this article, we will take you through the step-by-step process of tatting an anemone, providing you with the techniques and knowledge needed to create your very own stunning anemone design.
Anemones are known for their intricate patterns and delicate petals, making them a perfect choice for a tatting project. By following the techniques and steps outlined in this article, you will be able to create an anemone that showcases your creativity and craftsmanship.
Throughout this article, we will cover everything you need to know, from choosing the right thread to mastering the basic tatting techniques. We will guide you through creating the center ring, adding the petals, and even enhancing your design with beads. We will also explore different variations and designs, allowing you to personalize your anemone and make it truly unique.
Whether you are a beginner or an experienced tatter, this article will provide you with the knowledge and inspiration to create a stunning anemone design. So, let’s dive in and learn how to tat an anemone!
Choosing the Right Thread
Selecting the appropriate thread is crucial for a successful tatting project. When it comes to tatting anemones, you have a variety of thread options to choose from. Each type of thread offers its own unique qualities, so it’s important to consider your desired outcome before making a decision.
Here are some popular thread options for tatting anemones:
- Cotton Thread: Cotton thread is a popular choice for tatting anemones due to its softness and durability. It allows for intricate stitching and creates a delicate and elegant look.
- Silk Thread: Silk thread is known for its lustrous appearance and smooth texture. It adds a touch of luxury to your tatting project and creates a beautiful sheen.
- Rayon Thread: Rayon thread is a synthetic thread that mimics the look and feel of silk. It offers a wide range of vibrant colors and is easy to work with.
- Metallic Thread: Metallic thread adds a touch of sparkle to your anemone design. It comes in various shades and can be used to create eye-catching accents.
When selecting the right thread for your anemone, consider factors such as the desired texture, appearance, and overall look you want to achieve. Experiment with different threads to find the one that best suits your style and preferences. Remember, the thread you choose can greatly impact the final result of your tatting project.
Mastering Basic Tatting Techniques
Before attempting to tat an anemone, it is essential to have a solid understanding of basic tatting techniques. Tatting is a delicate form of lace-making that involves creating knots and loops with a shuttle or needle to form intricate patterns. By mastering these basic techniques, you will be able to create the beautiful and intricate patterns that make anemones so unique.
There are several fundamental stitches and methods that you need to learn in order to create the intricate patterns of an anemone. These include:
- Double Stitch: This is the basic building block of tatting. It involves making two half-hitch knots in a specific sequence to create a double stitch.
- Ring: A ring is a closed loop of double stitches. Rings are used as the foundation for many tatting patterns, including anemones.
- Chain: A chain is a series of double stitches connected by picots, which are small loops that create decorative elements in the lace.
- Joining: Joining is the process of connecting rings and chains together to create a cohesive lace pattern.
By practicing these basic tatting techniques, you will gain the skills and confidence needed to create the intricate patterns of an anemone. Remember to start with small projects and gradually work your way up to more complex designs. With time and practice, you will be able to create stunning anemones that showcase your creativity and skill.
Creating the Center Ring
The center ring is the most crucial element of an anemone design. It acts as the foundation upon which the entire flower is built. Follow these step-by-step instructions to create a perfect center ring that will serve as the starting point for your anemone.
To begin, choose a suitable thread for your tatting project. Ensure that it is strong, yet delicate enough to create intricate designs. Once you have selected the thread, thread your shuttle or needle with it.
Next, make a small loop with the thread, leaving a tail of about 6 inches. This loop will serve as the center of your ring. Hold the loop in your non-dominant hand, making sure the tail is on the bottom.
Now, take the shuttle or needle and pass it through the loop from back to front. Pull the thread gently to tighten the loop around the shuttle or needle. This will create the first half of your center ring.
Next, wrap the thread around the shuttle or needle in a clockwise direction, creating a second loop. Pass the shuttle or needle through this loop from back to front, just like before. Pull the thread gently to tighten the loop.
Continue wrapping the thread around the shuttle or needle and creating loops until you achieve the desired size for your center ring. Remember to pass the shuttle or needle through each loop from back to front, and tighten the thread after each loop.
Once you have completed the center ring, secure the thread by making a small knot at the base of the ring. Trim any excess thread, leaving a short tail.
Now, your center ring is ready to serve as the foundation for your anemone. You can begin adding the petals and other elements to create a stunning and intricate design.
Adding the Petals
Once the center ring is complete, it’s time to add the petals to your anemone. This is where the true beauty of the flower begins to take shape. The petals are what give the anemone its delicate and realistic appearance.
To create the petals, you will use the same tatting techniques that you learned for the center ring. However, there are a few key differences to keep in mind. The petals are typically longer and narrower than the center ring, and they require more intricate stitching to achieve their unique shape.
Start by attaching your thread to the center ring, just like you did when creating the ring itself. Then, begin tatting the stitches that will form the first petal. The number of stitches and the pattern you use will depend on the specific design you are following or creating.
As you work your way around the center ring, you will gradually build up the petals of the anemone. Each stitch adds to the overall shape and structure of the flower. Take your time and pay attention to detail to ensure that each petal is crafted with precision.
Remember, the petals should be delicate and realistic, so take care to create smooth curves and tapered ends. This will give your anemone a lifelike appearance and make it truly stand out.
If you’re new to tatting or need some inspiration, there are plenty of resources available online that provide step-by-step instructions and patterns for creating beautiful anemone petals. Don’t be afraid to experiment and try different techniques to find the style that suits you best.
Once you’ve completed all the petals, you can admire your stunning anemone design. The combination of the center ring and the delicate petals creates a flower that is both elegant and unique. Now, it’s time to move on to the next step and enhance your anemone with beads.
Enhancing with Beads
To add an extra touch of elegance to your tatting project, consider incorporating beads into your anemone design. Beads can bring a stunning effect to your anemone, making it stand out and catch the eye. By strategically placing beads on the petals and center of your anemone, you can create a beautiful and unique design.
When incorporating beads into your anemone, there are a few techniques you can use. One method is to thread the beads onto the thread before starting the tatting process. As you work on the petals or center, you can then incorporate the beads by sliding them up to the desired position. This method allows you to control the placement and spacing of the beads.
Another technique is to add the beads after completing the tatting. You can use a small crochet hook or a beading needle to thread the beads onto the finished tatting. Carefully insert the hook or needle through the stitches and slide the beads onto the thread. This method gives you more flexibility in terms of bead placement and allows you to experiment with different bead sizes and colors.
When choosing beads for your anemone, consider the overall color scheme and style you want to achieve. You can opt for small seed beads for a subtle and delicate look, or larger beads for a more bold and eye-catching effect. Experiment with different bead shapes, colors, and textures to create a unique and personalized design.
Remember to secure the beads in place by knotting the thread or using a small dab of glue if necessary. This will ensure that the beads stay in place and do not come loose over time.
By enhancing your anemone with beads, you can take your tatting project to the next level and create a stunning piece of art. The addition of beads adds an extra touch of elegance and sophistication, making your anemone truly stand out.
Finishing and Blocking
Once you have completed the tatting process for your anemone, it is crucial to properly finish and block it to enhance its shape and overall appearance. Finishing and blocking are essential steps that give your anemone a professional and polished look.
Blocking involves stretching and shaping your tatting project to achieve the desired shape and size. This process helps to eliminate any unevenness or distortions in the design, resulting in a more refined and visually appealing finished product. Here are the techniques to follow for blocking your anemone:
- Gently soak your tatting in lukewarm water for a few minutes to relax the thread fibers.
- Remove the excess water by carefully pressing the tatting between two clean towels.
- Place the damp tatting on a foam or blocking board.
- Using rustproof pins, pin the tatting to the board, following the desired shape and size of the anemone.
- Allow the tatting to dry completely while pinned in place.
- Once dry, carefully remove the pins and admire your beautifully blocked anemone.
Finishing refers to the final touches you can add to your anemone to enhance its appearance. Here are some techniques to consider:
- Trim any loose threads or excess yarn to create a clean and neat finish.
- Use a small crochet hook or needle to hide any remaining thread ends by weaving them into the tatting.
- Consider adding a small loop or ring at the back of the anemone to easily attach it to other projects or accessories.
- Apply a light starch spray to stiffen the tatting and help maintain its shape over time.
By following these blocking and finishing techniques, you can transform your completed tatting project into a professional and polished anemone that showcases your skills and creativity.
Exploring Variations and Designs
Tatting anemones is not only a creative endeavor but also an opportunity to explore a vast array of variations and designs. With this delicate flower as your canvas, you can let your imagination run wild and create anemones that are truly unique and personalized.
One way to explore variations is by experimenting with different patterns. There are numerous patterns available that can be adapted to create stunning anemones. Whether you prefer a more traditional design or want to push the boundaries of creativity, there is a pattern out there that will suit your style.
Another aspect to consider when exploring variations is the size of your anemone. You can create anemones in various sizes, from small and dainty to large and bold. The size of the anemone can greatly impact its overall appearance and can be used to create different effects.
Color is another element that can be explored when designing anemones. Anemones come in a wide range of colors, from vibrant and bold to soft and pastel. Experimenting with different color combinations can add depth and visual interest to your anemones.
To further enhance your designs, you can also incorporate different embellishments. Adding leaves, stems, or other decorative elements can give your anemones a unique touch and make them stand out from the crowd.
Remember, exploring variations and designs is all about expressing your individual style and creativity. Don’t be afraid to try new things and step outside of your comfort zone. The possibilities are endless, and the results can be truly breathtaking.
Experimenting with Color
Color plays a significant role in the beauty of anemones. The vibrant and eye-catching nature of these flowers is largely due to the creative use of color. By experimenting with different color combinations and shades, you can create unique and stunning anemones that stand out.
One way to experiment with color is by using a color wheel as a guide. The color wheel helps you understand how different colors relate to each other and how they can be combined to create harmonious or contrasting effects. For example, you can choose colors that are adjacent to each other on the color wheel for a more harmonious and subtle look. On the other hand, selecting colors that are opposite each other on the color wheel will create a bold and contrasting effect.
Another way to experiment with color is by considering the overall theme or mood you want to convey with your anemone. For a romantic and delicate feel, you can opt for soft pastel shades such as light pink, lavender, and pale yellow. If you want to create a vibrant and energetic look, you can choose bold and bright colors like red, orange, and purple.
Additionally, you can experiment with different shades of the same color to add depth and dimension to your anemone. By using lighter and darker shades of a particular color, you can create a sense of light and shadow, making your anemone appear more realistic and three-dimensional.
Remember, the key to experimenting with color is to have fun and let your creativity flow. Don’t be afraid to try out different combinations and shades until you find the perfect color palette that brings your anemone to life.
Adding Embellishments
Take your anemone tatting to the next level by adding embellishments. By incorporating additional elements such as leaves, stems, or other decorative elements, you can enhance the overall design of your anemone and make it truly unique.
One way to add embellishments is by creating leaves. You can use a contrasting thread color to create realistic and intricate leaves that will bring your anemone to life. Experiment with different leaf shapes and sizes to find the perfect fit for your design.
Another option is to incorporate stems into your anemone. This can be done by tatting a thin strip of thread and attaching it to the base of the flower. The stems can be straight or curved, depending on the desired look. They add a touch of elegance and create a more natural appearance.
In addition to leaves and stems, you can also consider adding other decorative elements to your anemone. This could include small beads, sequins, or even tiny pearls. These embellishments can be strategically placed on the petals or in the center of the flower to create a stunning effect.
Remember, the key to adding embellishments is to do so in a way that enhances the overall design of your anemone. Be creative and experiment with different elements to find the perfect combination that showcases your individual style and creativity.
Frequently Asked Questions
- Q: What types of thread are suitable for tatting anemones?
- Q: What are the basic tatting techniques I need to learn?
- Q: How do I create the center ring for an anemone?
- Q: How can I add realistic petals to my tatting project?
- Q: Can I incorporate beads into my anemone design?
- Q: How do I finish and block my tatting project?
- Q: Are there different variations and designs for tatting anemones?
- Q: How can I experiment with color in my anemone designs?
- Q: Can I add additional embellishments to my anemone design?
A: There are various types of thread that can be used for tatting anemones. Some popular options include cotton thread, silk thread, and metallic thread. The choice of thread depends on the desired outcome and personal preference.
A: Before attempting to tat an anemone, it is important to master some basic tatting techniques. These include the double stitch, picot, and ring. These techniques are the building blocks for creating intricate patterns in anemones.
A: Creating the center ring is a crucial step in tatting an anemone. To do this, start by making a small loop with the thread, then pass the shuttle through the loop, creating a ring. Tighten the ring carefully to ensure it is secure and even.
A: Adding petals to your anemone design requires a delicate technique. Start by making small loops with the thread and joining them to the center ring. Repeat this process, gradually increasing the size of the loops, to create realistic and beautiful petals.
A: Yes, you can enhance your anemone design by incorporating beads. To do this, thread the beads onto the shuttle before starting the tatting process. As you create each loop or petal, slide the beads onto the thread to add a touch of elegance and sparkle to your anemone.
A: Finishing and blocking your anemone is essential to give it a polished look. After completing the tatting, gently stretch the piece into shape and secure it with pins. Mist it with water or use a steam iron to set the shape. Allow it to dry completely before removing the pins.
A: Absolutely! Tatting anemones allows for endless creativity. You can experiment with different patterns, sizes, and shapes to create unique and personalized anemones. Let your imagination run wild and explore various design options.
A: Color is a key element in creating vibrant anemones. You can try different color combinations, such as using contrasting or complementary shades, to make your anemones visually striking. Don’t be afraid to play with color and see what combinations work best for you.
A: Absolutely! Adding embellishments can take your anemone tatting to the next level. Consider incorporating elements like leaves, stems, or other decorative elements to enhance the overall design and make your anemone truly unique.