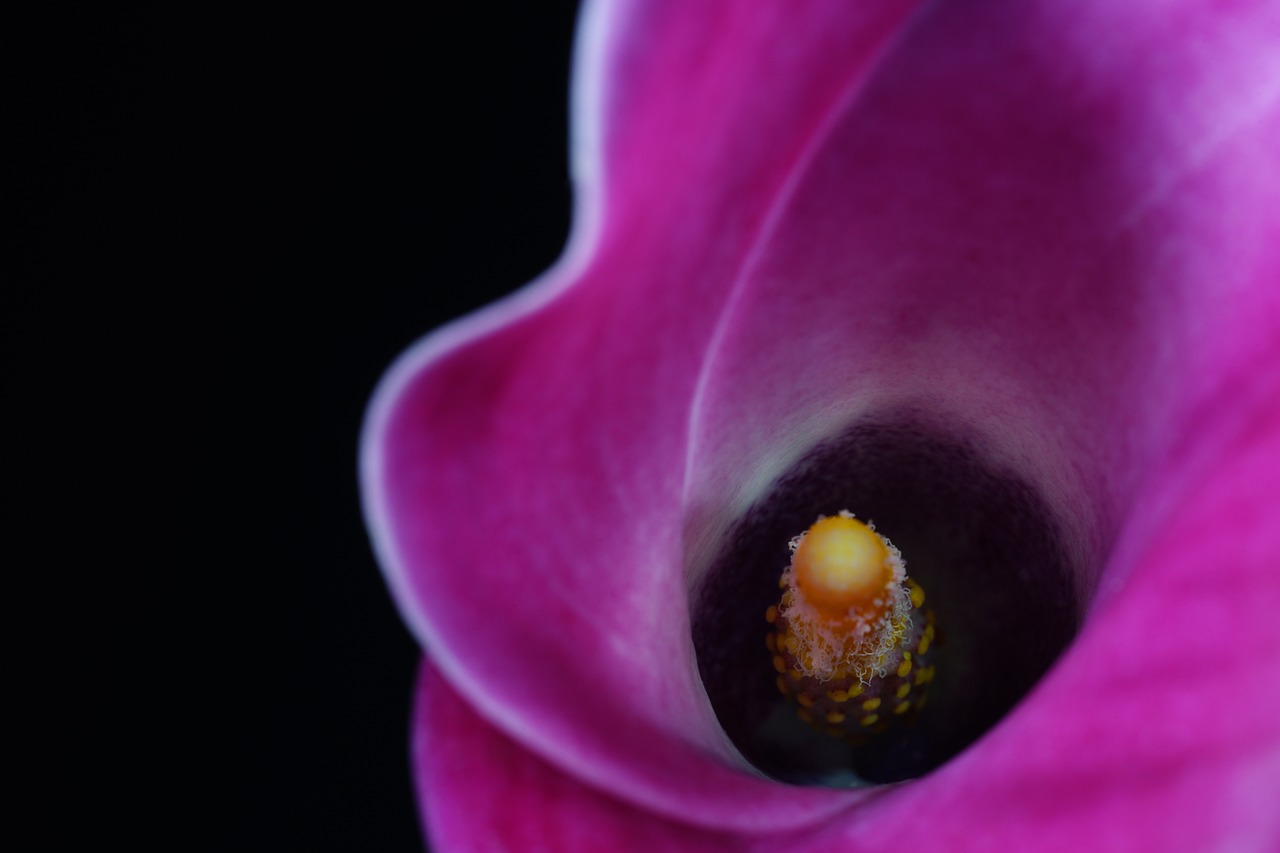
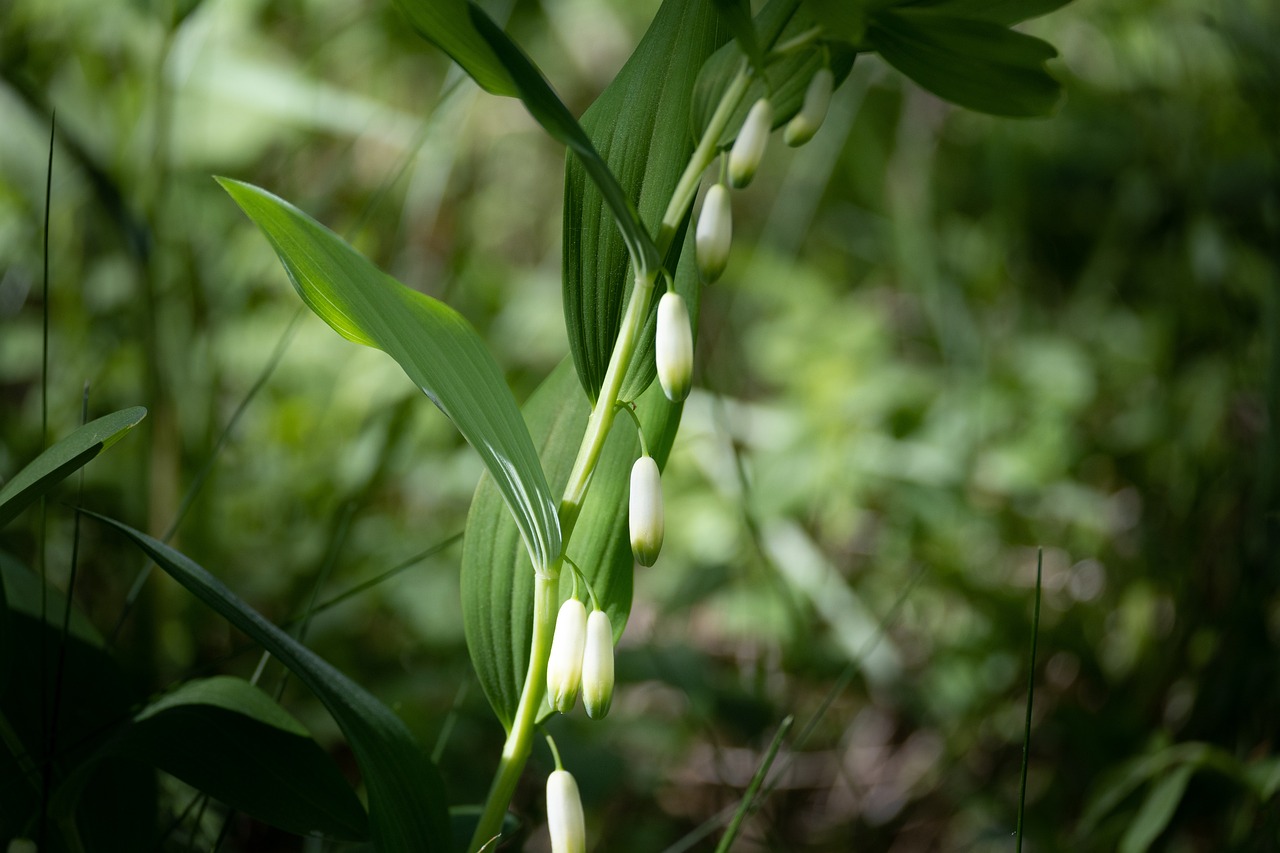
Are you ready to embark on a creative journey into the world of cross-stitching? In this step-by-step guide, we will explore the fascinating process of creating a cross-stitched Lily of the Valley design, a beloved flower motif in the art of embroidery. Whether you are a beginner or an experienced stitcher, this article will provide you with the knowledge and inspiration to bring this beautiful flower to life with needle and thread.
Before we dive into the intricate stitches and details, let’s gather the essential materials needed for this project. You will need fabric, embroidery floss, and a needle. Choose a fabric that is suitable for cross-stitching, such as Aida or evenweave, and select embroidery floss in the colors of your choice. A sharp needle with a small eye will make the stitching process easier and more precise.
Now that we have our materials ready, it’s time to prepare the fabric. Before starting your cross-stitching journey, it’s important to wash and iron your fabric to remove any dirt or wrinkles. This will ensure a clean and smooth surface for your stitches. Additionally, you can secure the edges of your fabric with tape or a zigzag stitch to prevent fraying.
Gathering Materials
Gathering the right materials is crucial when it comes to cross-stitching a beautiful Lily of the Valley design. Here are the essential items you’ll need to get started:
- Fabric: Choose a high-quality fabric that is suitable for cross-stitching. Aida cloth is a popular choice, as it has evenly spaced holes that make it easier to create precise stitches.
- Embroidery floss: Select embroidery floss in various shades of green and white to capture the delicate colors of the Lily of the Valley flower. DMC or Anchor brands offer a wide range of colors to choose from.
- Needle: Use a tapestry needle with a blunt tip. The size of the needle will depend on the fabric you’re using, but a size 24 or 26 is commonly used for cross-stitching.
Having these materials on hand will ensure that you have everything you need to create a stunning cross-stitched Lily of the Valley design. Now that you’re equipped with the right tools, let’s move on to preparing the fabric for your project.
Preparing the Fabric
Preparing the fabric is an important step in cross-stitching, as it ensures that your design will be stitched on a clean and smooth surface. Follow these tips to properly prepare your fabric for cross-stitching:
- Washing: Before starting your project, it’s recommended to wash your fabric to remove any dirt or sizing. Use a mild detergent and lukewarm water, and gently hand wash the fabric. Avoid scrubbing or wringing the fabric, as it can cause damage.
- Ironing: After washing, iron the fabric to remove any wrinkles. Set your iron to the appropriate temperature for the fabric type and use a pressing cloth to protect the stitches. Iron in gentle, straight strokes, avoiding any excessive pressure.
- Securing the edges: To prevent fraying, it’s important to secure the edges of your fabric. You can use a sewing machine to stitch a zigzag stitch along the edges or use a fabric glue or fray check product to seal the edges.
By following these steps, you’ll ensure that your fabric is clean, smooth, and ready for cross-stitching. This will help you achieve neat and professional-looking stitches, enhancing the overall quality of your Lily of the Valley design.
Choosing Colors
When it comes to choosing colors for your Lily of the Valley design, the possibilities are endless. The key is to select shades that will bring your cross-stitched flowers to life and create a realistic and vibrant look. Here are some tips to help you make the perfect color choices:
- Refer to reference images: Look at pictures of Lily of the Valley flowers to get a better understanding of their natural colors. This will help you select the right shades for your design.
- Consider the fabric color: Take into account the color of the fabric you will be stitching on. Choose colors that will stand out against the background and create a pleasing contrast.
- Experiment with different shades: Don’t be afraid to mix and match different shades of green for the leaves and stems, and various shades of white for the flowers. This will add depth and dimension to your design.
- Use color charts: Many embroidery floss brands offer color charts that show the available shades. Use these charts as a reference to select the colors that closely resemble the Lily of the Valley flowers.
- Consider the overall aesthetic: Think about the overall aesthetic you want to achieve with your cross-stitched design. If you want a more traditional look, stick to natural shades. If you prefer a modern or whimsical look, feel free to experiment with brighter or unconventional colors.
Remember, the choice of colors can greatly impact the final outcome of your cross-stitched Lily of the Valley design. Take your time to explore different options and select the shades that speak to you and bring your vision to life.
Creating the Lily of the Valley
In order to create a beautiful Lily of the Valley design in cross-stitch, it is important to follow step-by-step instructions to ensure that the intricate stitches and details are accurately captured. Here is a guide on how to create the Lily of the Valley flower, including the stem and leaves:
- Embroidery floss in various shades of green and white
- Cross-stitch fabric
- Cross-stitch needle
- Embroidery hoop
- Scissors
Begin by threading your needle with a shade of green embroidery floss. Knot the end of the floss and start stitching from the bottom of the design, following the pattern. Use a backstitch to create the stem, making sure to keep your stitches even and straight.
Switch to a lighter shade of green embroidery floss to create the leaves. Start stitching from the stem and work your way outwards, following the leaf pattern. Use a combination of cross stitches and backstitches to capture the shape and texture of the leaves.
Now it’s time to add the delicate Lily of the Valley flowers. Thread your needle with white embroidery floss and start stitching the flowers according to the pattern. Use small cross stitches to create the petals, making sure to leave space for the stem to show through.
To add depth and dimension to your design, you can use different shades of green embroidery floss to create shadows and highlights on the leaves and stem. Experiment with different stitch techniques, such as satin stitches or French knots, to add texture and interest to your design.
Remember to refer to the pattern and follow the instructions carefully to achieve the desired result. Take your time and enjoy the process of creating a beautiful Lily of the Valley design through cross-stitch.
Adding Embellishments
Adding Embellishments
Take your cross-stitched Lily of the Valley design to the next level by incorporating beautiful embellishments. These additional elements can add texture, sparkle, and dimension to your finished piece. Here are some popular options to consider:
- Beads: Add tiny seed beads to mimic the delicate flowers or use larger beads to create eye-catching accents.
- Sequins: Embellish the petals or leaves with sequins to create a shimmering effect.
- Metallic threads: Introduce metallic threads, such as gold or silver, to add a touch of elegance and shine to your design.
- Ribbons and trims: Incorporate ribbons or trims along the edges of your cross-stitched piece to create a decorative border.
When adding embellishments, it’s important to consider the overall design and the effect you want to achieve. Experiment with different options to find the perfect combination that enhances the beauty of your Lily of the Valley design.
Finishing Touches
When it comes to finishing your cross-stitched design, there are several options to consider. One popular choice is framing, which allows you to display your artwork on a wall or shelf. To frame your design, you will need a frame that is slightly larger than your stitched area. Place your design in the frame, making sure it is centered and straight. Secure it in place with the frame’s backing or with acid-free tape.
If you prefer a more three-dimensional display, you can mount your cross-stitched design on a foam board or canvas. This allows you to create a raised effect and adds depth to your artwork. To mount your design, cut a piece of foam board or canvas to fit the size of your stitched area. Use acid-free adhesive or double-sided tape to attach your design to the board or canvas. Trim any excess fabric and secure the edges to the back.
Another creative option is to turn your cross-stitched design into a decorative item such as a pillow or wall hanging. To make a pillow, cut two pieces of fabric slightly larger than your stitched area. Place your design between the fabric pieces, right sides facing out, and sew around the edges, leaving a small opening. Turn the pillow right side out, stuff it with fiberfill, and sew the opening closed. For a wall hanging, attach your design to a fabric backing using adhesive or stitching, and add a dowel or rod to hang it.
Troubleshooting and Tips
Embarking on a cross-stitching project can be an exciting and rewarding experience. However, it’s not uncommon to encounter some challenges along the way. In this section, we will discuss common cross-stitching issues and provide you with valuable tips and tricks to ensure a successful Lily of the Valley project.
One common issue that cross-stitchers face is tangles and knots in the embroidery floss. These can be frustrating and disrupt the smooth flow of your stitching. To avoid this, try using a thread conditioner or wax to reduce friction and prevent tangles. Additionally, make sure to anchor your thread securely at the back of your fabric to minimize the chances of knots.
Creating clean and even stitches is another crucial aspect of cross-stitching. Uneven stitches can detract from the overall appearance of your Lily of the Valley design. To achieve a polished and professional finish, make sure to use a hoop or frame to keep your fabric taut and prevent puckering. Take your time and pay attention to your tension, ensuring that each stitch is of equal length and tightness.
Remember, practice makes perfect. Don’t be discouraged if you encounter difficulties along the way. With patience and perseverance, you will overcome any obstacles and create a stunning cross-stitched Lily of the Valley masterpiece.
Avoiding Tangles and Knots
Embroidery floss tangles and knots can be a frustrating obstacle when cross-stitching, but with the right techniques, you can ensure smooth and frustration-free stitching. Here are some tips to help you avoid tangles and knots in your embroidery floss:
- Separate the Strands: Before starting your cross-stitch project, separate the strands of your embroidery floss. Most floss comes in strands of six, but you may only need to use two or three strands for your design. Separating the strands will help prevent tangles and knots.
- Use Shorter Lengths: Cut your embroidery floss into shorter lengths, around 18-24 inches, to minimize the chances of tangles and knots. Longer lengths can easily become tangled as you stitch.
- Keep a Tidy Work Area: Make sure your work area is clean and free from any obstructions that could cause your embroidery floss to snag or tangle. A clutter-free workspace will help you stitch smoothly.
- Thread the Needle Properly: When threading your needle, make sure the floss is securely threaded through the eye of the needle. Loose or uneven threading can lead to tangles and knots.
- Use a Needle Threader: If you’re having trouble threading your needle, consider using a needle threader. This handy tool can help you thread your needle quickly and easily, reducing the chances of tangles and knots.
By following these techniques, you can avoid tangles and knots in your embroidery floss, allowing for smooth and frustration-free stitching. Remember, a little extra care and attention to detail can go a long way in ensuring a successful cross-stitch project.
Creating Clean and Even Stitches
Creating clean and even stitches is essential for achieving a polished and professional finish in your cross-stitched Lily of the Valley design. Follow these tips and techniques to master the art of stitching with precision.
1. Use the right needle: Choose a needle that is suitable for your fabric and embroidery floss. A needle that is too large can create large holes in the fabric, while a needle that is too small may cause the floss to fray. Experiment with different needle sizes to find the one that works best for you.
2. Start with a waste knot: To ensure your stitches are secure and neat, start each thread with a waste knot. This involves making a small knot at the end of your floss and stitching it into the fabric before starting your actual stitches. Trim the excess thread once you have completed a few stitches.
3. Maintain tension: Consistent tension is crucial for creating even stitches. Avoid pulling the floss too tightly or leaving it too loose. Find a tension that feels comfortable for you and practice maintaining it throughout your stitching.
4. Use the right technique: There are different techniques for creating cross stitches, such as the “X” method or the “railroad” method. Experiment with different techniques to find the one that gives you the cleanest and most even stitches.
5. Take breaks: Cross-stitching requires focus and concentration. Take regular breaks to rest your eyes and hands, as fatigue can lead to uneven stitches. This will also help you maintain your patience and avoid rushing through your work.
By mastering the art of creating clean and even stitches, you will be able to achieve a polished and professional finish in your cross-stitched Lily of the Valley design. Practice these techniques and don’t be afraid to experiment to find what works best for you.
Frequently Asked Questions
- Q: What materials do I need for cross-stitching a Lily of the Valley design?
A: To cross-stitch a Lily of the Valley design, you will need fabric, embroidery floss, and a needle. These are the essential materials for this project.
- Q: How do I prepare the fabric before cross-stitching?
A: Before starting your cross-stitch project, it’s important to properly prepare the fabric. This includes washing and ironing the fabric to remove any wrinkles or dirt. Additionally, you can secure the edges of the fabric using a serger or by folding and stitching them to prevent fraying.
- Q: Can I choose different colors for my Lily of the Valley design?
A: Absolutely! You have the freedom to choose your desired colors for the Lily of the Valley design. Experiment with different shades to achieve a realistic and vibrant look that matches your personal style.
- Q: How can I create the intricate stitches and details of the Lily of the Valley flower?
A: Creating the Lily of the Valley flower involves following step-by-step instructions. Start by stitching the stem and then move on to the leaves and delicate petals. Pay attention to the placement of each stitch to achieve the desired effect.
- Q: Can I add embellishments to my cross-stitched Lily of the Valley design?
A: Absolutely! Adding embellishments such as beads, sequins, or metallic threads can enhance the visual appeal of your cross-stitched Lily of the Valley design. Get creative and experiment with different embellishments to make your design truly unique.
- Q: How do I finish my cross-stitched design?
A: After completing your cross-stitched Lily of the Valley design, you can finish it by framing it, mounting it on a decorative item such as a pillow, or turning it into a wall hanging. Choose a finishing method that best suits your preference and display the finished piece with pride.
- Q: What should I do if I encounter tangles or knots in my embroidery floss?
A: Tangles and knots can be frustrating, but there are techniques to avoid them. Take your time while stitching, and if you notice any tangles or knots, gently untangle or remove them before continuing. This will ensure smooth and hassle-free stitching.
- Q: How can I create clean and even stitches in my cross-stitched design?
A: Creating clean and even stitches is key to achieving a polished and professional finish. Practice your stitching technique and ensure that each stitch is placed neatly and evenly. Take your time and pay attention to detail for the best results.