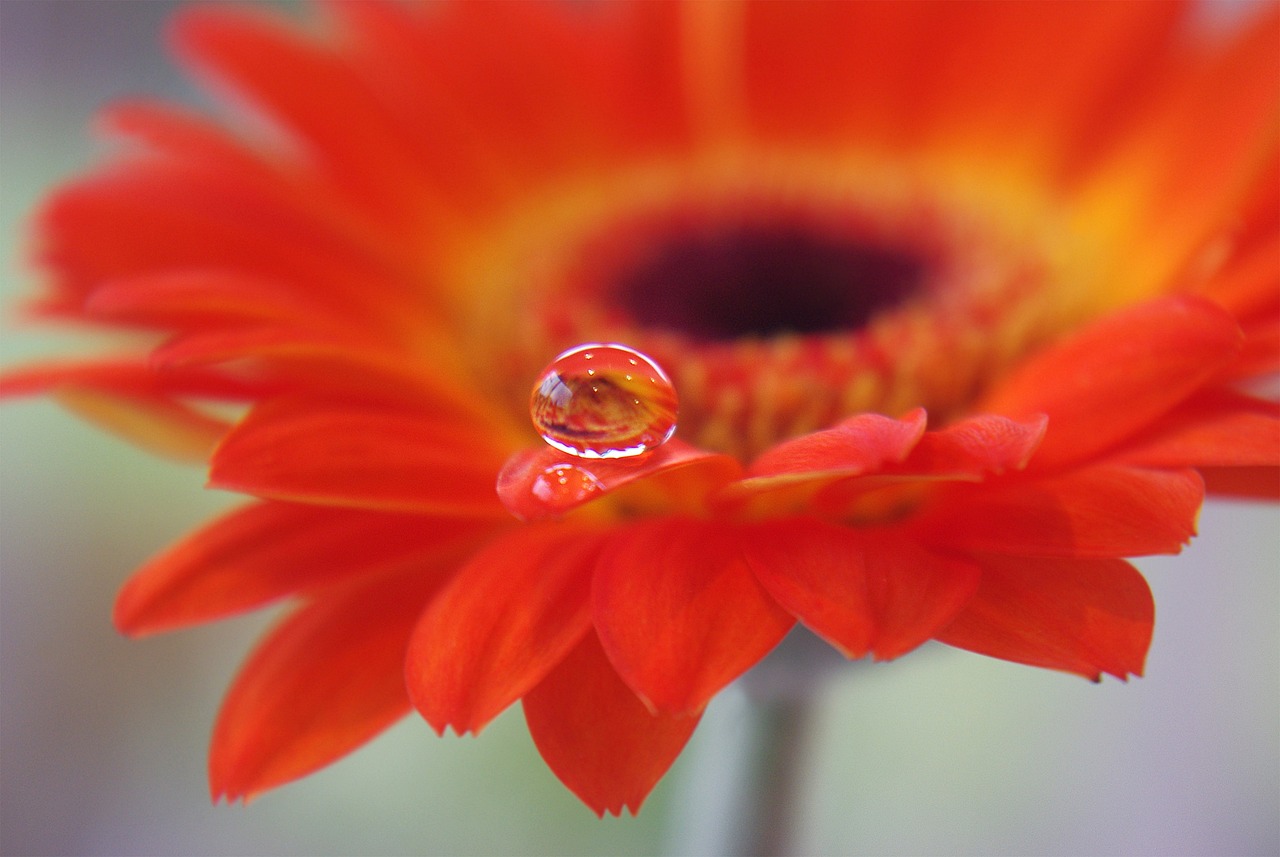
Are you ready to add vibrant and colorful gerberas to your garden? Growing gerberas from seed is a rewarding process that allows you to enjoy beautiful blooms right in your own backyard. In this article, we will guide you through the step-by-step process of growing gerberas from seed, from selecting the right seeds to caring for mature plants.
First and foremost, let’s start with seed selection. When choosing gerbera seeds, consider factors such as the desired flower color, plant size, and disease resistance. Select high-quality seeds to ensure successful growth and vibrant blooms.
Once you have your seeds, it’s time to germinate them. There are several methods you can use for germinating gerbera seeds. Pre-soaking the seeds can improve germination rates by softening the seed coat and promoting faster growth. You can also stratify the seeds, which involves subjecting them to a period of cold temperatures to enhance their germination. Another effective method is using a seed tray, which provides optimal moisture and air circulation for successful germination.
After germination, it’s important to care for the gerbera seedlings properly. This includes providing proper watering, lighting, and temperature requirements. By following the right care practices, you can prevent common issues and promote healthy growth in your gerbera seedlings.
Once your gerbera seedlings have matured, it’s time to transplant them into larger containers or your garden. Learn the proper techniques for minimizing transplant shock and ensuring successful establishment. Choose the right container size and type that provide proper drainage and enough space for root development. When transplanting into the garden, follow a step-by-step guide that covers optimal planting depth, spacing, and soil requirements for healthy growth.
Finally, caring for mature gerbera plants involves regular watering, fertilizing, and pest control. By maintaining proper care practices, you can enjoy vibrant blooms and extend the lifespan of your gerberas.
In conclusion, growing gerberas from seed is a rewarding and fulfilling process. By following the step-by-step process outlined in this article, you can successfully grow gerberas and enjoy their beautiful blooms in your garden. From seed selection to germination and care, you now have all the information you need to get started on your gerbera growing journey.
Choosing the Right Gerbera Seeds
When it comes to growing gerberas from seed, selecting the right seeds is crucial for successful growth. There are several factors to consider when choosing gerbera seeds, including the desired flower color, plant size, and disease resistance.
If you have a specific color scheme in mind for your garden, make sure to choose gerbera seeds that will produce flowers in the desired color. Whether you prefer vibrant reds, sunny yellows, or soft pastels, there are gerbera varieties available to suit your preferences.
Plant size is another important consideration. Some gerbera varieties are compact and are perfect for small garden spaces or container gardening, while others can grow quite tall and make a striking statement in larger gardens. Think about the available space and choose seeds that will fit well in your garden.
Disease resistance is also a key factor to keep in mind. Gerberas can be susceptible to certain diseases, such as powdery mildew or leaf spot. To ensure successful growth, look for gerbera seeds that are known for their disease resistance. This will help prevent common issues and keep your plants healthy and thriving.
Starting with high-quality seeds is essential for growing robust and beautiful gerberas. Take the time to research different seed suppliers and choose reputable sources that offer reliable and healthy seeds. Investing in high-quality seeds will greatly increase your chances of success and ensure that your gerberas flourish in your garden.
Germinating Gerbera Seeds
Germinating gerbera seeds is an essential step in growing these beautiful flowers. By following the best methods for germination, you can ensure successful growth and enjoy a vibrant garden filled with gerberas. There are three key techniques for germinating gerbera seeds: pre-soaking, stratification, and using a seed tray.
Pre-soaking Gerbera Seeds: Pre-soaking gerbera seeds can greatly improve germination rates. To pre-soak the seeds, simply place them in a container with warm water and let them soak for a few hours. This helps soften the seed coat and promotes faster growth.
Stratification for Gerbera Seeds: Stratification is another effective method for germinating gerbera seeds. It involves subjecting the seeds to a period of cold temperatures to mimic the natural winter conditions they would experience in their native habitats. This process helps break seed dormancy and enhances germination. It is recommended to stratify gerbera seeds for about 4-6 weeks at a temperature of around 40-45°F (4-7°C).
Using a Seed Tray for Gerbera Seeds: Using a seed tray provides a controlled environment for germinating gerbera seeds. Fill the tray with a well-draining seed-starting mix and sow the seeds according to the instructions on the seed packet. Ensure the soil is moist but not waterlogged and place the tray in a warm location with indirect sunlight. This method allows for optimal moisture and air circulation, promoting successful germination.
By utilizing these methods and creating the ideal conditions for germinating gerbera seeds, you can kickstart the growth of your gerbera plants and set them up for healthy development. Remember to provide consistent care and attention as the seedlings emerge, and soon enough, you’ll be rewarded with beautiful blooms in your garden.
Pre-soaking Gerbera Seeds
Pre-soaking gerbera seeds before planting can greatly improve germination rates and promote faster growth. This important step helps soften the seed coat, allowing water to penetrate more easily and kick-start the germination process. By soaking the seeds, you are providing them with the moisture they need to initiate germination.
To properly pre-soak gerbera seeds, follow these simple steps:
- Fill a small container with room temperature water.
- Place the gerbera seeds into the container, ensuring that they are fully submerged.
- Allow the seeds to soak for approximately 24 hours.
- After the soaking period, carefully remove the seeds from the water.
- Pat them dry with a towel or paper towel before planting.
By pre-soaking gerbera seeds, you are giving them a head start in the germination process. This technique can significantly increase the chances of successful germination and lead to healthier and faster-growing seedlings. So, don’t skip this important step when growing gerberas from seed!
Stratification for Gerbera Seeds
Stratification is a process that benefits gerbera seeds by mimicking the natural conditions they would experience in their native environment. This technique involves subjecting the seeds to a period of cold and moist conditions, which helps break their dormancy and promotes germination.
During stratification, gerbera seeds are typically kept in a moist medium, such as damp sand or peat moss, and placed in a cool location, preferably in a refrigerator. The recommended duration for stratifying gerbera seeds is around 4 to 6 weeks. This prolonged exposure to cold temperatures triggers the seeds’ internal mechanisms and prepares them for germination.
It is important to maintain the right temperature during stratification. The ideal temperature range for stratifying gerbera seeds is between 35 to 40 degrees Fahrenheit (1 to 4 degrees Celsius). This temperature range ensures that the seeds receive the necessary chilling effect without freezing, which could damage or kill them.
By stratifying gerbera seeds, you can significantly enhance their germination rates and increase the chances of successful growth. This process helps overcome the natural dormancy of the seeds and prepares them for the next stage of their development.
Using a Seed Tray for Gerbera Seeds
When it comes to germinating gerbera seeds, using a seed tray can offer several advantages. A seed tray provides a controlled environment for the seeds, allowing for optimal moisture and air circulation, which are essential for successful germination and growth.
One of the key benefits of using a seed tray is that it helps to prevent overcrowding of the seeds. By spacing the seeds evenly in the tray, you can ensure that each seed has enough room to grow without competing for resources. This promotes healthier seedlings and reduces the risk of disease or stunted growth.
When sowing the gerbera seeds in the tray, it’s important to follow the proper techniques. Start by filling the tray with a moistened seed-starting mix, making sure it is evenly spread. Then, gently press the gerbera seeds into the soil, ensuring they are not buried too deep. A general rule of thumb is to plant the seeds at a depth of about twice their size.
To maintain optimal moisture levels, cover the tray with a clear plastic lid or wrap it in a plastic wrap to create a greenhouse effect. This helps to retain moisture and create a humid environment for the seeds to germinate. However, it’s important to periodically check the moisture levels and provide water as needed to prevent the soil from drying out.
Adequate air circulation is also crucial for gerbera seed germination. To ensure proper airflow, you can create small ventilation holes in the plastic cover or remove it for short periods each day. This allows fresh air to circulate, preventing the buildup of excess moisture and reducing the risk of fungal diseases.
Using a seed tray for gerbera seed germination offers a convenient and effective method for ensuring successful growth. By following the proper techniques and providing optimal moisture and air circulation, you can increase the chances of gerbera seeds sprouting and developing into healthy seedlings.
Caring for Gerbera Seedlings
When it comes to caring for gerbera seedlings, there are a few essential practices that will help ensure their healthy growth and development. Proper watering, lighting, and temperature requirements are key factors to consider in providing the best care for your gerbera seedlings.
Watering: Gerbera seedlings require consistent moisture, but it’s important to avoid overwatering, as this can lead to root rot. Water the seedlings when the top inch of soil feels dry to the touch, and make sure the water drains well to prevent standing water.
Lighting: Gerbera seedlings thrive in bright, indirect light. Place them in a location where they receive at least 6-8 hours of sunlight per day. If natural light is limited, you can supplement with artificial grow lights to provide the necessary light intensity.
Temperature: Gerbera seedlings prefer temperatures between 65-75°F (18-24°C). Avoid exposing them to extreme temperature fluctuations or drafts, as this can stress the seedlings and hinder their growth.
To promote healthy growth and prevent common issues, it’s important to monitor your gerbera seedlings closely. Keep an eye out for signs of pests or diseases, such as yellowing leaves or wilting. If any issues arise, take immediate action to address them and prevent further damage.
By following these essential care practices, you can ensure that your gerbera seedlings thrive and develop into beautiful, vibrant plants that will bring joy to your garden.
Transplanting Gerbera Seedlings
Transplanting gerbera seedlings is a crucial step in their growth journey. It involves moving the young plants from their initial containers to larger pots or directly into your garden. This process allows the seedlings to have more space for root development and ensures their successful establishment. Here’s what you need to know about when and how to transplant gerbera seedlings:
1. Timing: It’s important to wait until the gerbera seedlings have grown to a suitable size before transplanting them. Typically, this is when they have developed at least two sets of true leaves. Transplanting too early can cause stress and hinder their growth.
2. Container Selection: If you choose to transplant the seedlings into larger containers, ensure that the containers have proper drainage holes to prevent waterlogging. Select pots that are slightly larger than the current containers, allowing enough space for the roots to spread.
3. Garden Preparation: If you decide to transplant the gerbera seedlings directly into your garden, prepare the planting area beforehand. Clear any weeds or debris and ensure the soil is well-draining and enriched with organic matter.
4. Transplanting Technique: Gently remove the gerbera seedlings from their current containers, taking care not to damage the delicate roots. Dig a hole in the new container or garden bed that is slightly larger than the root ball of the seedling. Place the seedling in the hole, ensuring that the top of the root ball is level with the soil surface. Fill in the hole with soil, gently firming it around the seedling.
5. Minimizing Transplant Shock: Transplanting can cause stress to the seedlings, leading to transplant shock. To minimize this, water the seedlings thoroughly before transplanting and ensure they are well-hydrated. Avoid transplanting during hot, sunny periods, and provide shade or cover for the seedlings if necessary.
6. Aftercare: After transplanting, water the seedlings gently to settle the soil around the roots. Monitor their watering needs and ensure they receive adequate moisture without becoming waterlogged. Protect the seedlings from extreme weather conditions and provide support if needed.
By following these proper transplanting techniques, you can minimize transplant shock and give your gerbera seedlings the best chance of establishing themselves in their new containers or garden. Remember to provide them with the necessary care and watch as they grow into beautiful, vibrant plants.
Choosing the Right Container for Transplanting
When it comes to transplanting gerbera seedlings, selecting the right container is crucial for their successful growth and development. The container size and type play a significant role in providing the ideal environment for the seedlings to thrive. Here’s what you need to know:
- Container Size: Opt for containers that are at least 4-6 inches deep and have a diameter of 6-8 inches. This size allows ample space for the gerbera seedlings’ root system to spread and grow.
- Container Type: Choose containers made of materials that provide good drainage, such as plastic or clay pots. These materials allow excess water to escape, preventing root rot and other moisture-related issues.
Additionally, consider using containers with drainage holes at the bottom to ensure proper water flow. This helps prevent waterlogging, which can be detrimental to the health of the gerbera seedlings.
Remember that the container should be sturdy enough to support the growing seedlings and withstand outdoor conditions if you plan to transplant them into your garden. By selecting the right container size and type, you provide the gerbera seedlings with the necessary space and drainage for healthy root development, setting them up for success in their new environment.
Transplanting Gerbera Seedlings into the Garden
Follow a step-by-step guide on transplanting gerbera seedlings into your garden. Learn about the optimal planting depth, spacing, and soil requirements for healthy growth.
Transplanting gerbera seedlings into your garden is an exciting step in the journey of growing these beautiful flowers. By following a few simple guidelines, you can ensure the successful establishment and healthy growth of your gerbera plants.
Step 1: Prepare the Soil
Before transplanting your gerbera seedlings, it is important to prepare the soil in your garden. Gerberas thrive in well-draining soil that is rich in organic matter. Ensure that the soil is loose and free from any debris or weeds.
Step 2: Choose the Optimal Planting Depth
When transplanting gerbera seedlings, it is crucial to plant them at the correct depth. The crown of the plant, where the stem meets the roots, should be level with the soil surface. Avoid planting the seedlings too deep, as this can lead to rotting.
Step 3: Provide Adequate Spacing
Gerbera plants require sufficient space for their roots to spread and for proper air circulation. When transplanting, ensure that you leave about 12-18 inches of space between each plant. This will allow them to grow and bloom without overcrowding.
Step 4: Watering and Mulching
After transplanting, water the gerbera seedlings thoroughly to help them settle into their new environment. Apply a layer of organic mulch around the plants to retain moisture and suppress weed growth. This will also help regulate soil temperature.
Step 5: Provide Sunlight and Protection
Gerberas thrive in full sunlight, so choose a location in your garden that receives at least 6-8 hours of direct sunlight each day. However, they can also benefit from some shade during the hottest part of the day to prevent wilting and sunburn.
Step 6: Regular Care and Maintenance
Once your gerbera seedlings are transplanted, continue to provide them with regular care and maintenance. This includes watering them regularly, especially during dry periods, and fertilizing them every 4-6 weeks with a balanced fertilizer.
By following these steps, you can successfully transplant gerbera seedlings into your garden and create a vibrant and colorful display of blooms. Remember to monitor the plants for any signs of pests or diseases and take appropriate action to protect them. With proper care, your gerberas will thrive and bring joy to your garden for years to come.
Caring for Mature Gerbera Plants
Once your gerbera plants have reached maturity, it’s important to provide them with the proper care to ensure vibrant blooms and a long lifespan. Here are some essential practices to follow:
- Watering: Gerberas require regular watering to keep the soil moist but not waterlogged. Water deeply, ensuring that the water reaches the roots. Avoid overhead watering, as it can lead to fungal diseases.
- Fertilizing: Feed your gerberas with a balanced fertilizer every 4-6 weeks during the growing season. Use a slow-release fertilizer or a liquid fertilizer diluted according to the package instructions.
- Pest Control: Keep an eye out for common pests like aphids, spider mites, and whiteflies. Use organic insecticides or natural remedies to control infestations, ensuring the health of your plants.
Additionally, consider the following tips to maintain the health and beauty of your mature gerberas:
- Remove faded flowers regularly to encourage continuous blooming.
- Provide adequate sunlight, as gerberas thrive in full sun or partial shade.
- Protect your plants from extreme temperatures and frost by providing appropriate shelter or moving them indoors during harsh weather conditions.
- Monitor the soil moisture levels and adjust watering accordingly, avoiding both underwatering and overwatering.
- Regularly inspect your plants for signs of disease or nutrient deficiencies, taking prompt action to address any issues.
By following these care practices, you can enjoy the beauty of your mature gerbera plants for an extended period, ensuring their longevity and vibrancy in your garden.
Frequently Asked Questions
- Q: How long does it take for gerbera seeds to germinate?
- Q: Can I start gerbera seeds indoors?
- Q: Do gerbera seeds require stratification?
- Q: How often should I water gerbera seedlings?
- Q: When should I transplant gerbera seedlings?
- Q: How often should I fertilize mature gerbera plants?
A: Gerbera seeds typically take around 10 to 14 days to germinate under ideal conditions.
A: Yes, you can start gerbera seeds indoors by using a seed tray and providing the right conditions for germination.
A: No, gerbera seeds do not require stratification. They can be directly sown or pre-soaked for better germination.
A: Gerbera seedlings should be watered when the top inch of soil feels dry. Avoid overwatering to prevent root rot.
A: Gerbera seedlings can be transplanted into larger containers or the garden once they have developed a few true leaves and are sturdy enough to handle.
A: Mature gerbera plants should be fertilized every 4 to 6 weeks during the growing season using a balanced fertilizer.